Designer Canvas
The canvas is the most important part of the Flow Designer. Every new flow starts with an empty
canvas on the Route tab where you design your integration. The Error Route tab also consists of
a canvas where you can design the error handling of your integration.

Designing your flow
You can start designing your flows by dragging components from the Components Library on the left and dropping them on the canvas. When you do this you may notice that the component becomes red, this is caused by validations. These validations are explained in the Flow Validations section.
Configuring components
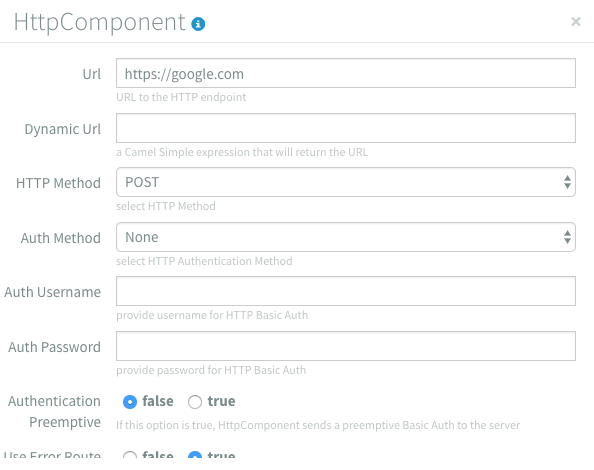
Almost all components have properties that need to be configured although some are optional or have default values. These properties can be accessed by double clicking on the component or by hovering over the component and clicking on the cog icon.

After clicking on the cog icon or double clicking on the component, a dialog opens with all available properties of the component.
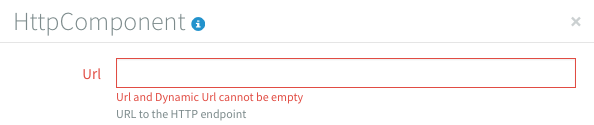
When a property is invalid it the input becomes red and an error message is displayed.
All property inputs have a small helper text that provides more information. For a full explanation
of the components properties you can click on the i icon at the top of the properties view. It will
redirect you to the documentation of the component.

Connecting components
Components can be connected to each other by dragging from one connector (the big blue sphere) to another. An arrow displays the direction in which the data will flow. For example, dragging from the Inbound HTTP component to the Email component allows the output of the Inbound HTTP component component to serve as input for the Email component. Note that some components cannot be used as either a first or a last component in a flow, depending on it’s characteristics.

Components can be consumers (receive data), producers (create data) or both, depending on their properties. Components capable of consuming data will have a connector on the left, producers will have a connector on the right. Components that can both consume and produce data will have connectors on both sides of the component.
Adding notes to components
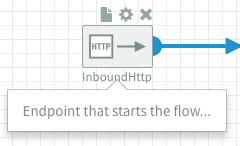
Integration flows can become quite complex, so to make them easier to understand for yourself and others you can add notes to every component. To add a note you hover over the component and click on the note icon.

A new dialog opens that contains a text box for your component note.

After adding a note to a component, a summary of that note will be shown when you hover over the component.
Copy and paste components
It is also possible to copy and paste components. This can be done in two ways. One is using key shortcuts and the other is by using the context menu. Both ways start by selecting the components using right click.

The components get a blue color when they are selected.
Copy and paste using key shortcuts
To copy selected components using key shortcuts you can use CTRL + c or CMD + c depending on your
platform. When the selected components are copied you will see a notification that confirms it. Now
that they are copied you can use CTRL + v or CMD + v to paste them. They will be pasted under the
original components. It is possible to paste them multiple times if needed.
Copy and paste using the context menu
To copy selected components using the context menu you can use right click on the canvas of the flow
designer and click on the copy action. When the selected components are copied you will see a
notification that confirms it. Now that they are copied you can use the context menu to specify where
on the canvas you want to paste the components using the paste action.
Combining both ways of copy and paste
Both ways can be used together, for example you can copy the components using key shortcuts and then paste them on a specific location on the canvas using the context menu.
Removing components
If you want to remove a component from the flow, you can hover over the component and click on the cross icon. If the component is connected to other components, the connections will be removed.

Handling errors
Managing and recovering from errors is a critical concern for any enterprise system. Dovetail puts this concern front and center: every flow has a error route, which has a fixed source of messages, the FailedExchange component. From this component the user has the flexibility to create a flow, just like any other flow.
Failed Exchange component
This component is always present on the error route. When unhandled exceptions are thrown from the regular flow, the exchanges that trigger resulted in an exception are routed to the failed exchange component. The component then has the ability to retry the failing exchanges for a few times, and ultimately, if they keep failing, it will cease retrying and just hand over the exchange payload to the next component in the error flow.
Configuration
The Failed Exchange Component presents the following configuration options:
| Option | Default | Description |
|---|---|---|
maximumRedeliveries | 0 | Number of attempts to retry failing exchanges |
redeliveryInterval | 5000 | Milliseconds between attempts |
If maxiumRedeliveries is set to 0, then no attempts are made to retry the exchange.
Examples
1- Get HTTP Response of a failed request
Error flow:
[ FailedExchange ] --> [ Velocity ] --> [ Mail ]
Velocity settings:
Hello!

Dovetail just failed to deliver an exchange to an external http endpoint.

Response from the endpoint:
${exchange.properties.get("CamelExceptionCaught").getResponseBody()}

--

Dovetail
This was a automatically generated email.
Exceptions thrown in the error flow
As exchanges enter the error flow, there is a chance that they will cause further exceptions. These exceptions can't be handled by the Failed Exchange Component, as that would quickly result in infinite loops (a failure on the error route would end up in the failed exchange component which would then hand over the exact same message to the error route). Instead, failures in the error route are just logged. The typical use cases for error handling should be simpler and less error prone than on regular flows.